
Curated with aloha by
Ted Mooney, P.E. RET

The authoritative public forum
for Metal Finishing 1989-2025

-----
Measurement of Anodizing Thickness; Best Testers and Methods
Q. I'm looking into buying a new isoscope for measuring thickness. We usually use Fisher brands, but I'm looking for one that has a probe that is water resistant to use on our processing line. We could just keep using what we have, but the probes get wet and then we have to let them dry for a day or two before next use, and they're not cheap -- roughly 900 bucks each. Any links or recommendations would be greatly appreciated. Thank you!
Jared goddard- Green Bay wisconsin
January 11, 2022
Ed. note: This RFQ is outdated, but technical replies are welcome, and readers are encouraged to post their own RFQs. But no public commercial suggestions please ( huh? why?).
A. Hello Jared
I feel your pain about the probes getting wet along with somewhat regular replacement of the probe. Here is a suggestion and all it would take is a little bit of discipline by the user. After the probe has been used to check thickness, use a rag to wipe the end dry. Then if you plan to store it on the line for further daily use, you can invest in a small tote with a locking cover. nothing extravagant or ornate. You might even be able to pick one up at the dollar store. They have a locking lid. The tote or storage container will keep the unit out of the line of fire from the hoses used to rinse any parts as well. you may also consider storing it in the container of which it was shipped to you by the vendor, being sure to keep it closed and the lid snapped shut. Find a shelf and tuck it away again out of the line of fire from the hoses.
supervisor - Cicero, Illinois
Saporito Finishing Co.
⇩ Related postings, oldest first ⇩
RFQ: We would like to purchase equipment to measure the thickness of Type II and III anodize coatings on our aluminum parts. Total thickness is typically 0.0002-0.0020.
Paul B [surname deleted for privacy by Editor]Norristown, Pennsylvania
1999
Ed. note: This RFQ is outdated, but technical replies are welcome, and readers are encouraged to post their own RFQs. But no public commercial suggestions please ( huh? why?).
Q. Please refer below details measured using Fisher Dualscope Thickness Measurement:
a) Sample without anodizing = 2.5 - 3 micron
b) Sample suspected without anodizing= 6.5 micron
c) Spec called out = 5 ~ 15 micron.
How can we judge the reading of anodizing?
If the non-coated sample reads at 3 micron, discoloration samples read at 6.5 micron. From 3 to 6.5 is only vary by 3.5 micron, this reading is out of specification.
-- or --
6.5 micron is the final result and it passes the specification.
Please help to advice which conclusion is true.
Thanks you very much.
Engineer - Malaysia
August 14, 2009
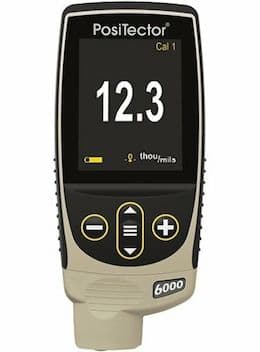
combo magnetic & eddy-current coating thickness tester
on eBay or
Amazon
(affil links)
A. First you have to "standardize" (calibrate) the eddy current instrument on clean BARE (no oxide) aluminum of same alloy and same heat treatment to be measured. Then use the plastic foil over the same clean aluminum and set the high end of the meter. Now you ready to measure the part (again of same alloy and same heat treatment).

Robert H Probert
Robert H Probert Technical Services
Garner, North Carolina

A. Please review the calibration once again prior to checking and then check again the bare aluminium (I presume it's aluminium metal)- if necessary to be sure whether it's bare aluminium or not, just emery
⇦ this on
eBay or
Amazon [affil links]
the surface and then measure. Because aluminium surface gets naturally oxidised in atmosphere which could interfere in measuring.
Good luck.
S. Basu
- Dubai, U.A.E.
Measuring hard anodise thickness concentricity
Q. I am a UK Manufacturing engineer, on assignment in Indonesia where my Company, has a Joint Venture with an Indonesian company, manufacturing components for aircraft wing control surfaces. We have a hard anodizing process line here and have a new component that requires a hard anodised, through bore, 12,825 mm diameter by 56 mm long in a prismatic block.
The bore has a thickness requirement of nominally 50 microns which, after honing, must be concentric to the original aluminium bore within +2 to -5 microns per surface (on radius).
My customer requires that we demonstrate, on an ongoing basis, adherence to this requirement
My question is, does anyone know of a measuring instrument or method on the market (Eddy Current, Ultrasonic etc,etc), other than direct measurement (on a CMM for example), that could measure this degree of concentricity accuracy, in a bore this small ?
Manufacturing engineer - Aerospace - Bandung, Indonesia
January 27, 2010
Automatic aluminium anodize thickness inspection
Q. Hello !
I am looking for a solution for automatic aluminum anodize thickness inspection on the process . We are anodizing a 6060 or 6063 aluminum profiles for architecture needs.
Most of the times the jig contains different profiles.
Today we measure thickness manually.
Thank you for a help
engineer - Israel
January 31, 2010
A. Mid-IR can quantify coating weight if that meets your needs.
Terry Tomt- Auburn, Washington, USA
Q. We anodize aluminum. We have an eddy current tester, however, I have some concerns. If I test a part then lift the probe and test it again I get a different number. Is this normal? I am close to the edge of the part. Is this a factor? Thanks for the help in advance.
Curtis Robb- Franklin, Indiana, USA
March 15, 2013
A. Yes, most definitively measuring the coating thickness near an edge will give you a lot of variance in your measurements. I've used many different models of eddy current testers over the years, and the manual on every one of them states that you should not measure close to an edge.
Of course, I'm also assuming that your gauge is calibrated daily with a certified shim that's close to the thickness you are trying to achieve with your coating, and on a surface that's representative of the one you are coating (both in roughness, and alloy).

Marc Green
anodizer - Boise, Idaho
Accuracy of Eddy Current Meters?
Q. Marc et. al., I have concerns with regard to the accuracy of any eddy current meter. Specifically, I'm not convinced that they can measure the thickness accurately given the differences in coloring methods, let alone the vast possibilities in pore aspect ratio (pore diameter vs. interpore distance) and sealing methods. What are your thoughts?
I'm specifying Type II, Class I architectural coating (18 µm minimum) with electrolytic (2-step) coloring on 6063 T6 aluminum, if that helps.
Thanks!
- Newark, Delaware, USA
July 1, 2013
A. Ben,
Anyone, please correct me if I'm wrong, but if your probe is designed for non-conductive coatings only then I wouldn't think a tin or nickel, 2 step coloring, should interfere with the thickness measurement.

Tim Hamlett, CEF
- West Palm Beach, Florida, USA
Q. Dear all;
I am new worker on the chemical coating process. Therefore my experience about the coating process is not enough to decide which method is the best for measuring the thickness of the coated film -- Eddy current or ultrasonic? My coated film types are anodize of aluminium, Cd and Zn plating on aluminium, and wet paint thickness. If you consider all these coating processes Which method should be chosen for measuring the thickness?
In addition, my company works in aerospace industry. Because of that reason, the method of the thickness measurement should fit the industry.
Please help me to choose correct device, I will purchase thickness measurement equipment.
Many thanks

Irem Tuncel Boğaz
Chemical Coating Engineer - Izmir, Turkey
October 27, 2015
Thickness Testing method for Chromic acid anodising
Q. I want to know about what could be the best method of testing of Coating in case of chromic acid anodised material. Kindly suggest me a method other than Electrical breakdown as IS 1865 clearly states that chromic acid anodised material is not under the scope of electrical breakdown. Same goes in the case of eddy current method which is for sulfuric acid anodising and neither continuity method.
Shishir ShrivastavaManufacturing engineer - Ranchi, Jharkhand, India
July 18, 2016
|
A. Hi Shishir, Aerospace - Yeovil, Somerset, UK A. Good day Shishir. Aerotek Mfg. Ltd. - Whitby, Ontario, Canada |
Q, A, or Comment on THIS thread -or- Start a NEW Thread
