Curated with aloha by
Ted Mooney, P.E. RET

The authoritative public forum
for Metal Finishing 1989-2025

Thread 426/60
Aluminum anodizing tolerance (Type 2)
Q. I have designed some aluminium components for a turbopump facility to be developed in my research laboratory. This application needs good dimensional precisions (IT6 and IT7 ranges), but the aluminium components have to be anodized in order to prevent corrosion (they are in contact with water and stainless steel components). The question is: what is the influence of anodizing process on dimensional tolerances? Is it possible to obtain the desired tolerances (IT6 and IT7) in components that have to be anodized?
Angelo CervoneCentrospazio - Pisa, Italy
2001
publicly reply to Angelo Cervone
Treatment &
Finishing of
Aluminium and
Its Alloys"
by Wernick, Pinner
& Sheasby

(note: this book is two volumes)
on eBay or
AbeBooks
or Amazon
(affil links)
A. Hi Angelo. Although you might be able to pick a tolerance class and then decide what metal shaping processes can meet it, I don't think you can pick the tolerance class and then decide what metal finishing processes will meet it. Firstly because you anodize for a reason, and that reason determines how thick the anodizing must be. You must first determine whether the anodizing can be 0.0002" thick or must be 0.002" thick. Most pumps probably have to be anodized to the 0.002" range; the tolerance will depend upon the required anodizing thickness (among other things).
Secondly, remember that anodizing is a partially additive process. Aluminum from the substrate is consumed in forming the aluminum oxide layer; building a 0.002" thickness consumes about 0.001" of aluminum, so the net dimensional increase is approximately 0.001"
Good luck.
Regards,

Ted Mooney, P.E. RET
Striving to live Aloha
finishing.com - Pine Beach, New Jersey
publicly reply to Ted Mooney
Tolerance change due to anodizing
Q. The tolerance of the completed component is 14 -0.01/-0.02 mm. To achieve this after black anodizing what should be the tolerance that is to be maintained during machining. This dimension is a thickness and not a hole or slot.
Sudheer. R- Singapore
2002
publicly reply to Sudheer. R
A. Hi Sudheer. Sorry, I don't understand what you wrote. But please note my previous response that approximately half of the anodizing thickness is effectively neutralized by consumption of the substrate. A 0.002" an anodized coating consumes about 0.001" of aluminum, for a net build of about 0.001"
Regards,

Ted Mooney, P.E. RET
Striving to live Aloha
finishing.com - Pine Beach, New Jersey
publicly reply to Ted Mooney
Q. We manufacture precision potentiometer housings out of 2024-T351 aluminum. The prints call for MIL-A-8625 / MIL-PRF-8625 [⇦ this spec on DLA], Type II, Class 2, Black anodizing. Our customer then heats the parts to 124 °C and does a "RUB" test. If any color rubs off, they reject them. My questions are: Does this failure mean they do not conform to 8625? Also, is there any coating that could go over the anodizing that would seal in the color after my customer has rejected them? All parts have dimensions with tolerances of ±.0002".
John J. Darcyprecision machining - Stoneham, Massachusetts
2006
publicly reply to John J. Darcy
A. I never heard of that test and it is not part of the mil spec. If you knew about it prior to taking the job, then it is ultimately your responsibility. The anodizer should have been requested to show on similar metal dummy parts that he could conform to the requirement.
All of that said, it sounds like a bad seal on the parts. It needs to be a high temperature seal such as nickel acetate and not a mid temp or low temp seal. The nickel or cobalt or possibly similar seals will work better than hot water seals. The parts that have not been heat tested probably can be resealed. I have doubts if the heated ones can, but it might work.
Are you really anodizing parts to a 2 tenths of a thousandths tolerance or is that a misplaced decimal point?
- Navarre, Florida
2006
publicly reply to James Watts
2006
A. I don't think the test your customer is doing has anything to do with the mil spec. A lot of black dyes will break down at 250 °F, so the test is really stretching the limits. I don't anodize 2024 anymore, but it's my understanding that it needs to be anodized in a higher concentration bath, preferably with a pulse-type rectifier.
As far as adding a coating, the only thing that comes to mind is a product called RO59, it's a teflon-type solution that you may immerse your parts in after anodizing. It adds very little thickness, and may help your parts pass the test.

Marc Green
anodizer - Boise, Idaho
publicly reply to Marc Green
![]() Yes James, we hold tolerances of ±.0002",but the anodizer we use must be very consistent with their method. The company that we patronize does a excellent job regarding that aspect, but it's the one lot out of approx. 100 that the color rubs off, kind of flakes off leaving the parts with silver specks. And being only a small manufacturer, having say one week's worth of work scrapped for cosmetic reasons can really hurt the bottom line. That's why I was wondering if anything could be applied over the anodize that would only be less than .0001" thick that would make it so when our customer rubs them, they would be rubbing on a coating that was over the anodize and not the anodize itself. I'm going to meet with my anodizer later this week but figured I'd try an unbiased opinion at this web site.
Yes James, we hold tolerances of ±.0002",but the anodizer we use must be very consistent with their method. The company that we patronize does a excellent job regarding that aspect, but it's the one lot out of approx. 100 that the color rubs off, kind of flakes off leaving the parts with silver specks. And being only a small manufacturer, having say one week's worth of work scrapped for cosmetic reasons can really hurt the bottom line. That's why I was wondering if anything could be applied over the anodize that would only be less than .0001" thick that would make it so when our customer rubs them, they would be rubbing on a coating that was over the anodize and not the anodize itself. I'm going to meet with my anodizer later this week but figured I'd try an unbiased opinion at this web site.
Precision Machining - Stoneham, Massachusetts
2006
publicly reply to John J Darcy

Aluminum How-To
"Chromating - Anodizing - Hardcoating"
by Robert Probert
Also available in Spanish
You'll love this book. Finishing.com has sold almost a thousand copies without a single return request :-)
A. Wow. 2 tenths of tolerance held across an entire rack.
Not using Titanium racking, this I assure you.
Anyways... if you could get the alloy switched to a 6XXX or 5XXX series the anodizer could increase the voltage a bit and shrink the pore size on the coating. This technique mixed with the mid-temp seal, followed by a hot water rinse should nearly render the coating impermeable!
Except with a caustic, not a phosphoric/Chromic stripper of course.
I know, Bob [Probert], Low/Mid Temp seals aren't for purists!

Ryan Cook
Toccoa, Georgia
2006
publicly reply to Ryan Cook
Holding tight tolerance in anodizing
Q. Plating allowance is specified on machined parts so that dimensions and tolerances apply after plating. The plating allowance on a part of 6061 aluminum is .00025" per side. The plating specification is MIL-A-8625 / MIL-PRF-8625
[⇦ this spec on DLA], Type 2, Cl-2.
This part has 2 dowel pin holes for a .1875 ± .0001 diameter dowel pin for a press fit of .0005 to .0008". The true position of the holes is set at .003 dia. max. material condition. Can the plating thickness be held accurate enough to ensure true position this tight is maintained?
If the plating thickness varies by a tenth or two the true position can be out of tolerance. The question is, "What can reasonably be expected in plating thickness variation?" Another question is, "Will the dowel holes plate at the thickness specified the same as flat surfaces?"
Design Engineer - Williston, Vermont, USA
August 19, 2008
publicly reply to Robert Wittemeyer
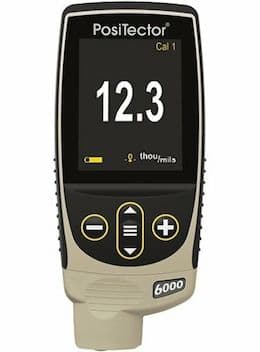
combo magnetic & eddy-current coating thickness tester

on eBay or
Amazon
(affil links)
A. Hi, Robert. The spec you quoted is for anodizing rather than electroplating. I note this not to be a pedantic fuddy-duddy but because achieving uniform anodizing thickness is different and easier than achieving uniform electroplating thickness.
The anodizing process builds a non-conductive, insulating, coating on the parts, so the thicker the anodizing gets in a particular spot, the more resistive that area is, and the less opportunity for anodizing current to flow to that spot and continue the buildup. So rather uniform thickness is an expected feature of anodizing, but not of plating. You may be interested in ...
- letter 4212, "Getting fine control of hard anodize thickness" and
- letter 5060, "Anodic coating thickness Statistical Capability"
Still, I think it would be more conventional to mask those holes rather than to try to press fit a pin into an anodized hole. The depth of the hole, and whether it is blind or not, will govern how readily solution flows through it, but good solution flow is essential for proper anodizing and even thickness; I wouldn't count on consistent anodizing thickness in a hole unless special provision was made, rather than typical mass-production racking. Plus, the anodizing is likely to chip/crack at the sharp edge of the hole if you press fit a metal dowel into it. Good luck.
Regards,

Ted Mooney, P.E. RET
Striving to live Aloha
finishing.com - Pine Beach, New Jersey
August 20, 2008
publicly reply to Ted Mooney
Multiple threads merged: please forgive chronology errors and repetition 🙂
Black Anodized 6061 and ±.0002" Tolerances
Q. We have a job that requires a few bored holes be held to ±.0002" and they cannot be masked from the Type II, Black Anodize.
The bores are .935 Inch Diameter through holes, about 3/4" deep.
The first batch we sent to anodizing only 30% of the parts came back in print and the rest were oversized (up to .0003" out).
The anodizer is now telling us that it's impossible to hold ±.0002" on a Machined + Type II part because they need at least that much tolerance for just the anodizing processes.
Does this sound true, or do we need to look for a better shop?
Machinist - San Jose, California, USA
February 22, 2011
publicly reply to Steve Myers
A. Hi, Steve.
The plater is 90% right. To get proper color saturation for black anodize, the anodizing thickness probably must be at least about 0.0005" thickness, maybe 0.0008" (although the thickness should actually be spec'ed) . Of this, about half will cut into the surface and half build onto the surface, and when you measure a hole diameter you will see this .00025-.0004" growth on both sides of the hole, so the anodizing will reduce the diameter of a hole by about .0005-.0008". If you drill the holes .0005" oversize (or whatever the specified anodizing thickness is), it might be possible to hold the .0002" tolerance.
Regards,

Ted Mooney, P.E. RET
Striving to live Aloha
finishing.com - Pine Beach, New Jersey
February 24, 2011
publicly reply to Ted Mooney
A. Another thing to keep in mind, is that depending on how the parts are racked, the inside of the bore may not anodize at the same rate as the external surfaces, typically you'll get less coating growth on the inside of a bore, than you will on the outside, unless special cathodes are set up. You may want to give your anodizer a go/no-go gauge that they can use to check the parts/bores after anodizing to make sure the coating build up is adequate before dyeing.

Marc Green
anodizer - Boise, Idaho
February 24, 2011
publicly reply to Marc Green
A. Steve
In a well controlled shop, you could reasonably expect a .0002" range in the thickness of the anodize. In my experience, parts that have a ± .0002" tolerance are machined using all of the tolerance, so that any variation in coating thickness will produce parts that are out of tolerance. So if you sort the parts, + .0000 / -.0001" and provide them to the anodizer in the 4 or 5 lots, they can anodize them, 1 lot at a time, and utilize the full tolerance to make the parts acceptable.
Another option is to plan the coating thickness and allow for honing afterwards.
- Colorado Springs, Colorado
February 24, 2011
publicly reply to Willie Alexander
Anodizing Thickness of 18 ± 2 microns, is this possible?
Q. We have a requirement from a client to get an anodizing thickness of 18 ± 2 microns. So far with our initial testing we have managed a 16 to 23 micron thickness. We ran 260 small parts on a rack. 7 racks on a flight bar, and the racks are titanium grade 2.
My question is this, is a tolerance of ± 2 microns feasible? Is it like throwing a hot dog down a hallway or threading a bridge cable through a needle?
What sort of changes can we make to give ourselves a better shot at hitting our mark?
Thanks guys, this is all the information I have at the moment, if more is required to give a better answer, I'll see what I can find.
- Concordville, Pennsylvania, USA
April 15, 2015
publicly reply to Tyler Wilz
Q, A, or Comment on THIS thread -or- Start a NEW Thread