
Curated with aloha by
Ted Mooney, P.E. RET

The authoritative public forum
for Metal Finishing 1989-2025

-----
Powder Coating Rework Disaster
February 5, 2015
Q. We're a small metal fab company manufacturing a wide variety of steel parts and assemblies for local businesses. Our powder coating line runs over 20,000 pieces a year with very few issues. Recently we ran a couple of items through with generally good results, the exception being some particulate contamination on a vertical surface. Nothing but some small raised specs here and there. No distortion of the finish, just a little bump, maybe 1/64th at most. Since these assemblies are the first articles for a new project, and the surface with the particles would be seen by the end user, we decided to try and rework just that surface.
The process is as follows: the surface was sanded down to the metal (A36 steel) and then cleaned thoroughly with acetone
⇦ this on
eBay
or
Amazon
[affil links] Warning! highly Flammable!
. The units were heated to about 140 °F, then coated and baked.
We did the sanding in the weld shop, and I can verify the surface was cleared of the coating and smooth. The rest of the process was handled by the 2nd shift crew. The result is an epic fail as you can see by the pictures.
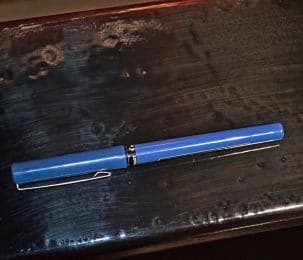
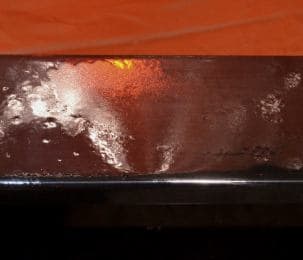
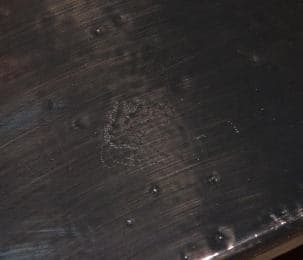
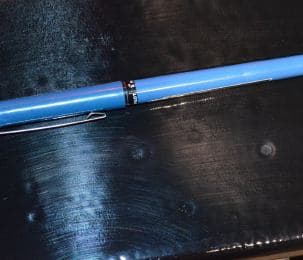
(Click on the thumbnails to see full size high-rez pictures)
The crew swears they followed the procedure. So what happened?
We do very little rework on coating. When we do we send the piece out to have the old coating burned off and then we redo the entire piece. For our coating line that's shot blasting, coat, and bake.
We just sent the units out to get the whole piece cleaned off the right way, and then we'll run them like normal.
Any insights you might have as to what caused the wide variety of defects will be greatly appreciated.
Quality manager - Reading, Pennsylvania USA
February 18, 2015
A. Well your standard repair procedure, being strip back to base metal and re-coat is the right way to go.
What appears to be shown in the photographs are swirls from aggressive sanding and reverse ionisation craters.
I note you pre-heat before recoating: that is good, but do you cut back gun voltage?
In any case, it is pretty near impossible to generate a first class coating on a partial re-coat.
Assuming the initial coat was satisfactorily cured I do not see how you could avoid overbake when curing your repair coat?
This is a problem best avoided by doing it right first time or if that was not possible stripping completely and doing it better next time.
We have a saying in Australia:
"Good, better, best never let us rest until our good is better and our better best"
Hope this helps,
Bill
Trainer - Newcastle, NSW Australia
February 18, 2015
Q. Bill, thanks for the feedback. I should explain that I'm new to the powder coating part of the metal fab business, so I may ask questions that most experienced finishing experts consider elemental.
So, I'm not clear on the reverse ionization mechanism. Is this a case where surface contaminants create a dielectric between the steel substrate and the gun which could block or diminish the difference in potential? From a practical standpoint perhaps the acetone wipedown left dirt or lint, or some other contaminants.
Any thoughts on what might create the sunken textured looking section in the picture with the burnt umber background? When you go to the high def screen and magnify you can see it very clearly.
Thanks again for your assistance. I doubt we'll be attempting to make local repairs to finish flaws in the future. Our reject rate coming off the line is so low that it's just not cost effective. As you said, better to get it right the first time.
- Reading Pennsylvania USA
February 19, 2015
A. There are very many learned treatises readily available on the internet detailing what happens with reverse ionisation in powdercoat.
In the USA I believe the phenomenon is more usually referred to as: back ionisation.
To simplify:
Your substrate is negatively charged because you have been throwing negatively charged powder particles at it.
You have cured them and by doing so insulated the base metal.
You now throw another shower of negatively charged powder particles at it.
Enough is enough, in nature.
Similar charges repel.
The substrate rejects the superfluous negatively charged particles projected at it and explodes them back.
That is what creates the craters.
This is a dramatic over-simplification.
It does I hope convey what has occurred.
I do hope this helps.
Let me also suggest that the next shop floor recommendation to you will be to employ Aerosol "touch up" cans to overcome basic shop floor incompetence.
Do not fall for that one.
Aerosol paint will begin to oxidise very rapidly.
You could have rejects everywhere before you know it.
Right first time is the maxim.
There are no short cuts to good workmanship.
If you are not a good workman get out.
Be Hard, be fair and you will get respect and a product you can be proud of as will your team.
Regards,
Bill
Trainer - Newcastle, NSW Australia
February 19, 2015
![]() Thanks for the detailed explanation. I did a search for reverse ionization and didn't come up with anything yesterday. I'll look for back ionization.
Thanks for the detailed explanation. I did a search for reverse ionization and didn't come up with anything yesterday. I'll look for back ionization.
I'm in complete agreement RE getting it right the first time. From my perspective this is a lesson learned on the feasibility of post-coating repairs.
Thanks,
Eric
- Reading, Pennsylvania USA
February 19, 2015
Compared to the first attempt at coating have the imperfections gotten bigger or smaller after the second coat?
Did the entire run of parts do this or only one piece?
- Charlotte North Carolina
Q, A, or Comment on THIS thread -or- Start a NEW Thread
