Curated with aloha by
Ted Mooney, P.E. RET

The authoritative public forum
for Metal Finishing 1989-2025

-----
Techniques to Measure Thickness of Electroless Nickel Plating
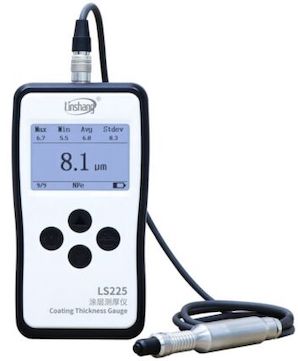
Q. We purchase Electroless Nickel plating for our products. We desire to be able to do an "in house" spot check of material thickness. It was suggested we get a hand held meter, but I have not found one suggested for use with EN. Is there a technique that can be used for measuring the plating thickness that is non-destructive or is someone aware of a meter or gauge that can be used to spot check?
Janice KornasManufacturing Engineer - Ann Arbor, Michigan, USA
July 21, 2011
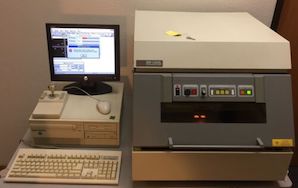
A. Bench-top X-Ray Fluorescence is typically used. It is relatively expensive and it does require electroless nickel thickness standards for creating the method and for periodic quality checks. Hand-held XRF's ⇦ this on eBay or Amazon [affil links] are generally only used for material identification and I wouldn't recommend them for thickness measurements. If your parts are too large for the cabinet, you could have your supplier concurrently run a test coupon with your parts and then you could make a make the measurement on the coupon.

Jon Barrows, MSF, EHSSC
Independence, Missouri
Q. Hi all....long time reading, first time posting.
So I am in need of a good gauge for reading the thickness of electroless nickel on 6061T aluminum, and also to read hard chrome on 17-4 stainless steel. I am looking for a non-destructive method to measure the thickness.
I will be polishing both of these deposited layers, and will need to monitor the layer over the length of the polishing process.
Our typical plate to thickness is .001" MAX. I will need accuracy to .0001" if possible.
I will be measuring tools with radii that are often very large and would like a handheld unit.
I also would obviously like one unit to be able to work for both needs (chrome/nickel). But if not possible for the accuracy needed that is fine.
Thanks for taking the time to read this and helping,
-Dustin
- Temecula, California, United States
July 3, 2013
A. Hi Dustin. As you'll read on topic 50120, measuring chrome on stainless isn't done with a cheap handheld instrument. However, it is not uncommon to simply use a micrometer to measure the stainless steel before the plating process, and then re-measure to determine the chrome thickness as the difference. That sounds iffy at the lower end of your range though.
If you do resign yourself to XRF, it should be fine for the EN also, as discussed above. Good luck.
Regards,

Ted Mooney, P.E.
Striving to live Aloha
finishing.com - Pine Beach, New Jersey
Q. Hi
We have XRF for measuring plating thickness for all kind of metals. With that, EN high P plating thickness can't be measured more than 20 microns, even though we have coupon for 26.4 microns which is showing properly.
Base material is aluminium 6061 & 7054.
Customer spec is 25-30 micron EN high P
Is there any other non-destructive method available? Eddy current method is not possible?
Before it was showing up to 30 microns easily; after machine supplier calibration it's not showing properly; and now machine supplier is saying it is not possible to measure more than 20 microns with any XRF.
Please suggest any alternative method and confirm that it's really not possible to measure more than 20 microns with XRF.

m. karthikeyan
- Bangalore, Karnataka, India
July 29, 2015
Q. Good Day,
I have a problem where my parts I.D sometimes get oversized and undersized. The parts are EN teflon plated. Plated in rack.
Before plating, part is oily and go-gauge can go in the ID easily. However, after plating, go-gauge cannot enter the parts ID. Can you advise on how can I solve this issue?
*thickness is between desired specs
Plating Shop - Klang, Selangor, Malaysia
February 14, 2018
A. Hello Afiq, are you are talking about a hole in the part that takes a go gauge? If so you could be experiencing "hourglassing". The outside of the part is getting a little more EN plating than the inside. Is there a way you could do a cross section of the area that is in question to verify this? Is there a bath analysis performed right before your runs? Temp and ph? Is the solution agitation and rack agitation consistent? I was in the Printed Circuit Board industry for many years and have found that EN baths require attention to detail. We always got excellent results when we had excellent bath control. Hope this info helps.
Mark BakerProcess Engineering - Phoenix, Arizona USA
February 21, 2018
Q, A, or Comment on THIS thread -or- Start a NEW Thread


