Curated with aloha by
Ted Mooney, P.E. RET

The authoritative public forum
for Metal Finishing 1989-2025

Thread 550/72
How to measure copper plating thickness on steel
WE ARE MANUFACTURERS OF WHITE METAL BEARINGS & COPPER PLATED GASKETS.
WE DID COPPER PLATING ON MILD STEEL, ABOUT 70 MICRONS ON EACH FACE.
FIRST FLASH COATED WITH A CYANIDE COPPER DEPOSIT,
COPPER PLATED.
QUESTION IS : WHAT IS THE ACCURATE METHOD OF COPPER PLATING THICKNESS MEASUREMENT & WHICH INSTRUMENT CAN GIVE ACCURATE READINGS.
PLATING SHOP - KARNATAKA, India
May 21, 2010
publicly reply to MRUTYUNJAYA KATTEPPANAVAR
|
|
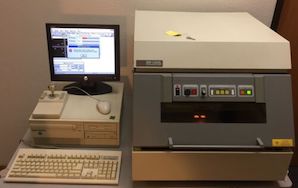
A. That all depends on the accuracy that you need. A magnetic device may be all that you need. Beta back scatter would be better. Cutting a part for metallurgical examination is very accurate but destructive. If you need ridiculous accuracy, you are into very costly equipment such as SEM. James Watts- Navarre, Florida publicly reply to James Watts A. Dear MRUTYUNJAYA KATTEPPANAVAR, - Salem, Tamil Nadu, India publicly reply to Kannan Boopathi A. X-Ray Fluorescence can do it non-destructively with the proper thickness calibration. Terry Tomt- Auburn, Washington publicly reply to Terry Tomt |
A. Dear Mrutyunjaya Katteppanavar:
70µ can accurately be measured by cross sectioning and calibrated microscope. However the cross sectioning is time-consuming and needs skilled people who know what they do.
I wonder if XRF can do the job, ask the suppliers for XRF layer thickness machines (UPA, Seiko, Matrix Metrologies, Helmut-Fischer, SII Nano technologies to name a few).
If this equipment cannot, a cheaper alternative is couloscopic measurement (again Helmut-Fischer, but more suppliers are available). Maybe start with the couloscope question and if this can't, think about the XRF. Both are quite big investments (the XRF app 3 times higher than a couloscope) the cross sectioning is cheap but as said needs skilled persons to give the accurate results it can give.
Before you buy any of these instruments, ask for a hire period and perform in that period an R&R study. You will not be the first one who's disappointed in the performance for your specific application. Or specify exactly what you really need and so expect. Bought is bought.
Best regards,

Harry van der Zanden
consultant - Tilburg, Netherlands
publicly reply to Harry van der Zanden
Q, A, or Comment on THIS thread -or- Start a NEW Thread
