-----
Adhesion problem when two zinc iron parts are "toxed" together.
September 2, 2009
We are a metal finishing Company that is applying a zinc iron plating to two steel parts.
The thickness is 8-16 microns. We are meeting all requirements of spec.DIN50962.


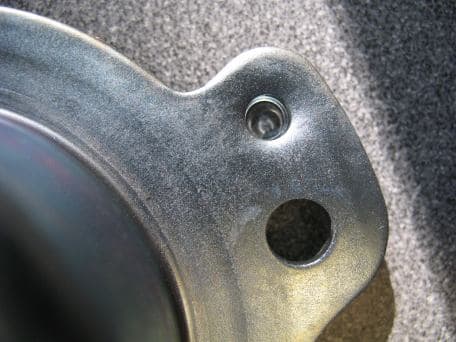
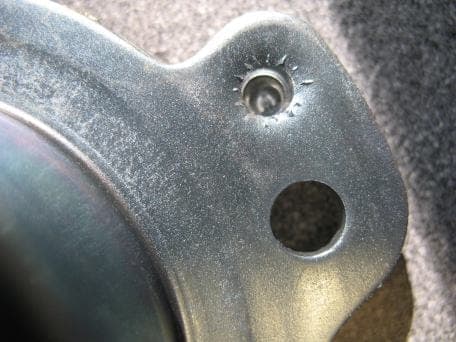
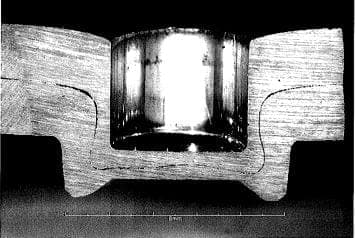
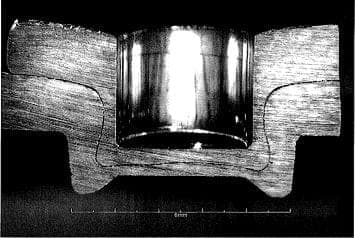
However when our customer receives the parts they put them together with a process they call Toxing.
This actually pushes the steel from one part thru the other part and forms a crimp on one side. The diameter of the punch is .175 and .200 depth.


Sometimes there haven't been any problems and sometimes there have. We are trying to figure out what if any changes where done to the plating line. However we believe no plated parts could handle this severe of a punch. We have worked on this project for 10 weeks and are about to shut down our customers line and ours if we don't find a solution. Please respond ASAP if you have any suggestions - we are at our ropes end!
Thank you
Diana Bench
Owner - Muskegon, MI USA
September 3, 2009
Zinc-iron is an alloy plate (that I have never done) and most literature will say that there are variations in the alloy unless it is tightly controlled, and even then, there will be minor variations.
Since you have some pass and some fail their abusive process, I suspect that there might be an alloy that you could plate that might withstand the process. It will take an analysis of the failed parts and of the survivor parts to sort out if it the alloy or a minor variation of their punch process.
Both of your companies should have expected the failure of at least a few of the parts.
Can you paint the affected area and get by?
- Navarre, Florida
What are the tolerances for the hole and the insert prior to crimping? Metal plating is not an exact science and there needs to be a degree of tolerance for the insert to get through the hole without getting jammed. I note the Fe-Zn thickness is 8-16 microns, so the size of the hole and the insert can vary by 16-32 microns and in an extreme case, the hole "clearance" can vary by up to 64 microns if the insert and hole are both plated to their maximum thickness.
The deposit thickness around both the hole and the insert will not be exactly uniform, so you need to take account of this as well. I would therefore suggest you reassess your parts' specification tolerances.

Trevor Crichton
R&D practical scientist
Chesham, Bucks, UK
September 10, 2009
Q, A, or Comment on THIS thread -or- Start a NEW Thread