Curated with aloha by
Ted Mooney, P.E. RET

The authoritative public forum
for Metal Finishing 1989-2025

Thread 397/94
Measuring thickness of nickel plating on nickel-bearing substrates (nickel-cobalt, stainless steel)
1998
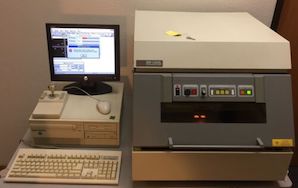
Q. I would like to find a means (device) that accurately measures nickel plating. The plating would be on mostly copper surfaces, some nickel-iron and stainless. The copper pieces would be cylindrical in nature. I know XRF is the best means, but are there other devices that anyone has used that were successful in measuring nickel thickness? Look forward to your replies.
Dave.
publicly reply to Dave Bernardini
A. Dave: I was in the coating thickness measurement industry many years ago (approx. 1985-1990). The only other method I can think of (and I assume it's still in use) is coulometric, where a very small, defined area is deplated. The amount of time necessary to reach the substrate is, of course, proportional to its thickness. Standards are used to ensure accuracy. Drawback: it is a "destructive" test. The test areas can be fairly small (< 0.1").
The company I worked for, Twin City International, is OOB.
Craig Brown- Hemet, California, USA
2005
publicly reply to Craig Brown
Q. What is the best way to measure sulphamate nickel plating thickness of 7.62-12.7 µm on a nickel-cobalt alloy base metal. Hand held thickness meters are proving unsuccessful.
Douglas Mulholland, BSc.Aerospace - Glasgow, Scotland
2006
publicly reply to Douglas Mulholland, BSc.
1st of two simultaneous responses --
A. You can make a cross-section of the sulphamate nickel coated Ni-Co alloy and measure the coating thickness using an optical microscope. Adequate measures should be taken while cutting the samples to prevent damage of the nickel coating. Electrodeposition of a thin layer of copper over the nickel coating could prevent damage during cutting.

T.S.N. Sankara Narayanan
- Chennai, Tamilnadu, India
(ed.note: The good doctor offers a fascinating blog, "Advancement in Science" )
2006
publicly reply to T.S.N. Sankara Narayanan
2nd of two simultaneous responses --
A. I'm impressed you want to measure down to 7.62 µm - that means you need to measure to ± 5 nanometers. I do not know what you want to measure and why, but these are extremely small units and I am not convinced you actually need it. However, if you do, try using AFM microscopy, or possibly a betascope, but you will need to have a good substrate. Alternatively, try doing a bit of metallography and use an SEM - optical microscopy doesn't go down to the sub micron level!

Trevor Crichton
R&D practical scientist
Chesham, Bucks, UK
2006
publicly reply to Trevor Crichton
![]() Thanks Trevor, but I happened to notice that if we convert Douglas' numbers to inches, his range comes out to an even .0003" to .0005". So it looks like the extreme precision of the 7.62 µm number was probably just an artifact from a conversion from inches to microns, rather than an actual requirement for that degree of precision. The conversion took us from one significant figure to 3 significant figures on a scale 2.54X as small, imposing a precision 254X as tight as probably intended :-)
Thanks Trevor, but I happened to notice that if we convert Douglas' numbers to inches, his range comes out to an even .0003" to .0005". So it looks like the extreme precision of the 7.62 µm number was probably just an artifact from a conversion from inches to microns, rather than an actual requirement for that degree of precision. The conversion took us from one significant figure to 3 significant figures on a scale 2.54X as small, imposing a precision 254X as tight as probably intended :-)
So XRF or conventional cross-sectioning and optical microscopy is probably fine.
Readers may be interested in thread no. 7652, "Microsection vs. XRF method for plating thickness measurement".
Regards,

Ted Mooney, P.E.
Striving to live Aloha
finishing.com - Pine Beach, New Jersey
publicly reply to Ted Mooney
How to check if Nickel has been plated on a Stainless steel part?
Q. Hi All,
I have two parts that came back from the supplier that we had sent it to. Problem is, that both the parts look almost the same. We were trying to see if there is any way we can check if one of them is Nickel plated without damaging the base metal (Stainless Steel). We cannot afford to lose the metal part but just want to check for the plating.
- Houston, Texas, USA
January 6, 2015
publicly reply to Abhijit Wadagole
A. NI CHECK ON STAINLESS STEEL PART: YOU CAN USE KOCOUR ELECTRONIC THICKNESS TESTER -- THIS TEST IS A DESTRUCTIVE TEST. OTHER EQUIPMENT IS FISCHERSCOPE mms SOLD BY FISCHER TECHNOLOGY. THIS TEST IS NON-DESTRUCTIVE.

Popatbhai B. Patel
electroplating consultant - Roseville, Michigan
January 10, 2015-- apologies, finishing.com misfiled this reply, and didn't post it until February 1 publicly reply to Popatbhai B. Patel
A. I think ...
1. When you need to check the thickness of the nickel plating, you can use X-Ray Fluoresence (XRF); a well-known one is FISCHER SCOPE X-RAY to not destroy the surface.
2. When you need to check the deposit behavior, you can use cross-section cutting and magnifier analysis by Scanning electron microscope (SEM).
3. When you need to check the purity of the deposit metal (nickel), you can use X-Ray Diffraction (XRD).
- Bangkok Thailand
February 4, 2015
publicly reply to Sittikorn Rakjai
Q, A, or Comment on THIS thread -or- Start a NEW Thread
