-----
Creating technique to measure anodizing process cheapest
I would like to know the cheapest method to create jig to measure anodizing thickness variation after the process so has to build in house
William G- Penang , Malaysia
2003
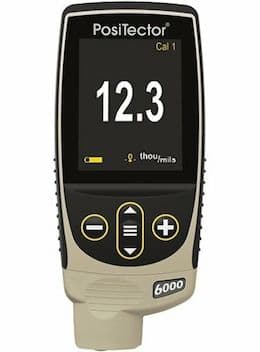
combo magnetic & eddy-current coating thickness tester

on eBay or Amazon
(affil link)
This method is common in the machining industry but not in anodizing.
First, the set-up is very simple. You build a fixture (similar to a quick-release vise) to hold the part. On the fixture frame, attach a dimension measurement tool. The assembly is a large micrometer, and the tools are available from micrometer suppliers.
However, this cannot measure the actual anodize thickness, but rather the total dimensional change of the part. The anodize thickness (conventional sulfuric acid process) is approximately 2 times the buildup (increase of any one surface) because some aluminum is consumed in the process. This ratio depends upon the alloy and the anodizing solution concentration and temperature. For hard anodize, the ratio is closer to 3/2. Also, some aluminum thickness is lost if use an etching process. And, if the parts were not precisely machined, cannot accurately measure. So, the applicability of the mechanical measurement method for anodize is very limited; most experienced anodizers can probably give a more accurate thickness by controlling time and voltage.
Anodize thickness is usually measured by an eddy current tester designed specifically for measuring non-conductive coatings on metals. No fixturing is needed, so easy to measure different parts. Many testers are handheld devices, allowing in-process thickness measuring for better quality control.
Ken Vlach [deceased]- Goleta, California
Rest in peace, Ken. Thank you for your hard work which the finishing world, and we at finishing.com, continue to benefit from.
2003
Q, A, or Comment on THIS thread -or- Start a NEW Thread